
Softening:
After wringing, open the hide as much as possible. Wringing will compact the hide into fairly dense material, but if well brained, the hide will open up when pulled and stretched. The softening tools used here are a rawhide cable and an elk scapula mounted to a pole to make a softening stake. Both work well if the hide is well brained.

Once the hide has been opened and stretched by hand to approximately its original size, then I work the hide over the cable to further open and stretch the fibers.
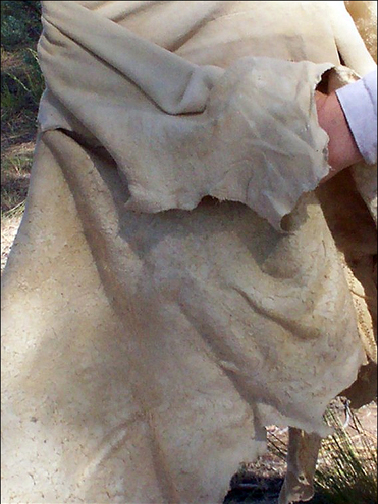
When I cable a hide, I work in a system to ensure that I work the entire hide in at least 2 directions. To do this, I begin with the tail up and center, grab the hide on each side, and work the hide side to side over the cable trying not to let the strip that is being worked bunch up very much. This works a strip of hide about 4-6" wide and about 18-24" wide. Then I shift my hands down the width of the worked part to the next unworked part and repeat. Repeat all the way to the neck. Then I reset the hide with the tail up again and work the right side, then reset and work the left. Then I rotate the hide 90 degrees and starting at the hind section I work the back third of the hide from one back leg to the other, shift to the middle section of the hide and repeat the process, then shift to the front third of the hide and repeat the process again. This takes me 10-15 minutes, if I do it well and it works the body of the hide in two directions. The body of the hide should be very loose and flexible at this point.
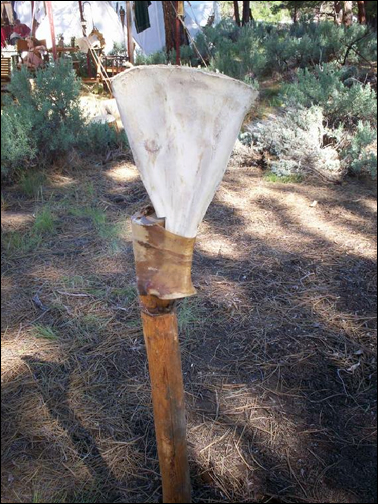
Now it is time to work the edges: I work about 6-8" of edge at a time. I like the cable for this, but a stake is just as efficient. Photo of stake above.

Work a section of the edge back and forth a couple of times to stretch.
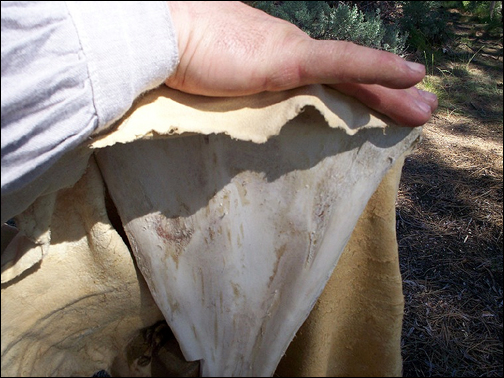
Then rotate that section 90 degrees and lay it over the stake, place your free hand on top of the stake and put lots of pressure on the hide, then pull the hide out from under your hand as you keep the pressure on it. This will work the hide all the way to the very edge. Move over to where the edge has not been worked and repeat, move in the same direction all around the hide.
After working the entire hide, including the edges, I lay the hide out flat over a rope or parallel beam and pull and manipulate it until it is as flat as possible and as close to original size and shape as possible. I usually let it rest for 10-20 minutes or so. If I am working 2 hides at the same time, this is where I work the other hide completely, then switch and repeat with hide number 1.
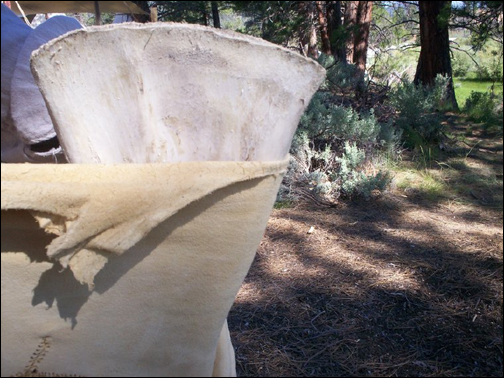
Another picture showing the hide being worked over the distal end of the stake.
Smoking and Finishing:
When the entire hide is soft and dry, then you are done softening. Use your cheek or lips to see if any area of the hide is cooler than another. If an area is cooler than the air temperature, then the hide is not dry in that spot - keep working! Many hides that do not turn out nice are a result of the person quitting too soon.
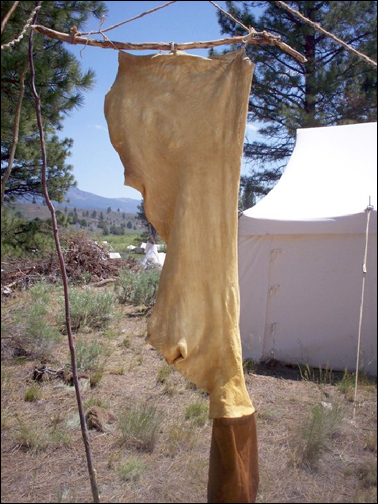
There are several ways to get smoke into the hide - I will cover one of them. Sew, staple, or glue the hide into a sock, and attach a tube of cloth to the bottom end. The cloth is to allow attachment to the stovepipe without damaging the hide or discoloring it. Place some coals in a stove, place rotten wood on the coals and close the damper and air on the stove.

Suspend the hide over the stovepipe, slip the cloth skirt over the pipe, and use a string to tighten the skirt around the pipe, forcing any smoke from the pipe to go up and into the hide sock. Open the damper on the stove to allow the smoke into the hide, but do not open the primary air intake of the stove. You want cool smoke from smoldering rotten wood, NOT FIRE or FLAMES. Smoke the hide until desired color is reached. Remove the hide, turn it inside out and repeat to smoke the other side until desired color is reached.
The rotten wood should be rotten enough to crumble with your hands to ensure that it will smolder and not burn efficiently. When you are finished smoking, pull the hide down and open it up flat.

DONE!
Hope this helps somebody.
![]()
E-mail your comments to "Patrick Farneman" at patrickf@bridgestothepast.org
Visit www.bridgestothepast.org and join us in the journey of discovering our roots - the ancient ways and skills that help define who we are. Bridges to the Past is a non-profit organization dedicated to education and preservation of our shared human history through the skills of our ancestors.
We hope the information on the PrimitiveWays website is both instructional and enjoyable. Understand that no warranty or guarantee is included. We expect adults to act responsibly and children to be supervised by a responsible adult. If you use the information on this site to create your own projects or if you try techniques described on PrimitiveWays, behave in accordance with applicable laws, and think about the sustainability of natural resources. Using tools or techniques described on PrimitiveWays can be dangerous with exposure to heavy, sharp or pointed objects, fire, stone tools and hazards present in outdoor settings. Without proper care and caution, or if done incorrectly, there is a risk of property damage, personal injury or even death. So, be advised: Anyone using any information provided on the PrimitiveWays website assumes responsibility for using proper care and caution to protect property, the life, health and safety of himself or herself and all others. He or she expressly assumes all risk of harm or damage to all persons or property proximately caused by the use of this information.
© PrimitiveWays 2013